Pages

Please leave me comments of what you would like to see in the future for tips and projects!

Sunday, September 30, 2012

Meal Plan for the Week of Oct 1st

     How is tomorrow already October 1st? That just doesn't seem possible! I've been super busy the last couple of days trying to pack. Yesterday Graham and I went to the Cedar Rapids and got some things for the condo. We found the comforter sets for both the master and the guest bedroom. We bought a table for the living room (that is gorgeous and awesome, can't wait to show you), a desk for my computer, a cool bookcase as well as some pillows for the living room and some paint for furniture. So we got a lot done! And all for about 400 dollars! 
     But that's enough about what's been going on the last couple days. Now it's time to look at this weeks meal plan. I'll admit this week isn't the most exciting as far as food goes. I am trying to use up some of the food that is in the freezer as well as other things in our pantry. I'm not trying any new recipes this week although I will be posting the recipe for the white chili when I make it. But let's just say that my trip to the store is going to be really cheap this week! There are only about 5 items that I need to get, I may think of a couple more but I still wont have very many.
     I am really trying to use what I have so there is not as much to move. I know maybe that is silly, there will still be a lot in the way of food to move but I guess it is just a mental thing for me. I also wanted to make the meals for this week simple because I am going to start painting the condo and I am still working on packing as well. So here is this weeks meal plan...


Monday-
Lunch- Leftover Alfredo
Supper- Croatian Brats w/ sour kraut
Brussel sprouts

Tuesday-
Lunch- Leftover Alfredo
Supper- Naan pizza

Wednesday-
Lunch- Misc leftovers
Supper- White Chili

Thursday-
Lunch- Leftover white chili
Supper- Baked fish/ Brussel sprouts

Friday-
Lunch- Leftover fish and brussel sprouts
Supper- Pork Loin in crock pot with red potatoes

Saturday-
Lunch- Hamburgers
Supper- Croatian Brats

Sunday-
Lunch- Vinton
Supper- Popcorn/ snack

This week I am CookingSimpleForReal! 

Friday, September 28, 2012

Recipe: Chicken Broccoli Alfredo

     This week has definitely been a crazy one so I didn't stick to the meal plan needless to say. Wednesday night we were out at my parents helping with harvest and we had yummy stew (thanks mom!). Yesterday some friends had a family emergency and so we were at their house and I helped make supper and then we ate with them.
     So tonight I decided to make the chicken broccoli alfredo since it had the fresh veggies that needed used. It was actually a great thing to make tonight because it was supper fast to make because I had the chicken cooked and the veggies were chopped.
     So all I did was boil a pot of water, add the pasta and cook. When the pasta had about 5 minutes left to cook, I added the cooked chicken as well as the veggies. Then I drained it and added the alfredo. This is how it looked....

     It was really good and Graham Cracker really liked it too! I can't wait to have leftovers, I always love leftover alfredo! Well, I'm tired but I should probably go work on packing. So until next time, stay OrganizedForReal! 

Tip of the Day: Master Grocery List

     You're in the grocery store and you go from aisle 1 to 2 to 5 to 6 and back to 2, then back to 5. You are jumping all around the store, you're frustrated and you just want to go home. Sound familiar? What if you could go straight through the store with no back tracking? Sound good? Well guess what? You can! How? By having a master grocery list! 
     This takes just a little bit of time to put together but will save you so much time every time you go to the store! If you can picture a mental outline of your grocery store, go ahead. If not, the next time you are in your grocery store, make note of the different sections. You will list produce, canned goods, dry goods, desserts, ethnic, pasta, dairy, meat, frozen, etc. You can be as specific as you want. On your computer, create a document that has about 3 columns. Through these column, list the sections in the order of the store. 
     Now when you fill in the groceries that you need to get, put them in the correct section. You can either fill the sections in on your computer or just print the list with the section titles and fill it out as you need. If there are certain items you purchase weekly, feel free to type them into the appropriate section. This will make your weekly grocery shopping even easier.
     I have also found it helpful to have an area at the top of the list to list the food you are making for the week so that you can reference it while shopping. This way you can be OrganizedAtTheGroceryStoreForReal!

Thursday, September 27, 2012

Tip of The Day: Organizing Spices

     Do you ever open your spice cabinet or look at your spice rack and it takes forever to find what you are looking for? A lot of people have this problem, just keep it the way it is, and deal with it. But why deal with it when you can take a little bit of time and organize them once and for all? Well, I'll admit, I'm guilty of this, I haven't done it yet but I am hoping to this week. (Look for that post soon!)
     People have many different ways of keeping their spices but everyone can employ a few simple methods to keep them all organized. You may have a cabinet you keep them in, a stationary rack, a rotating rack or even perhaps a pull out drawer or rack. I currently have both a cabinet and a rotating rack. The rack sits on the counter underneath the cabinet where there are more spices. 
     One tip is to make sure that your bottles are well labeled. If you use the bottle from the store they are normally well labeled but if you are using a spice rack with special containers, be sure that put a label on them. Eventually I am going to get rid of some of the spices that I don't use and fill them with spices that I do and relabel the containers. 
     Another tip I have is to organize all of your spices in alphabetical order. This way you will always know where to find the spices that you are looking for. Just be sure to put them back where they go!
     My last tip is to put a small round sticker on the bottom of the container and mark the date it was opened. This way you will always know the freshness of your spices and know when you need to replace them. By doing this you will be OrganizedForReal in the kitchen!

Tuesday, September 25, 2012

Moving: Boxes

     One of the most important things to have when you are moving is boxes of course. But do you want to spend a lot of money on boxes? I just looked at a popular moving companies website and their boxes range from $1.25 to 3.25 PER BOX!!!!!! That's just crazy! So what am I doing instead, you may be thinking. 
     Well, I definitely believe that everyone should invest in some plastic totes. They are worth getting because they are durable and good to keep for storage as well. But there is no way that I am buying enough of those totes to move all of our stuff so what am I going to do with the rest of our stuff? Well, I just got back from the grocery store and I got 6 apple boxes! These are great because they are very sturdy and they also have a lid which makes for great stacking! See!


     I will keep checking back at our local grocery store to get more the next couple weeks as well. Well, I think it's time to start packing again! Well, maybe I should finish folding my laundry first then packing! Use these few tips and you can be Organized PackingForReal!

Monday, September 24, 2012

Meal Plan and Prep: Week of Sept 24th

     Monday morning is always the day that I plan my meals for the week and get groceries. So here is what this week's menu looks like...


Monday-
Lunch- Leftover Taco Soup
Supper- Bacon and eggs and pancakes

Tuesday-
Lunch- Leftover Taco Soup
Supper- Naan pizzas

Wednesday-
Lunch- Leftover smokies from freezer
Supper- White Chili
             Cabbage Salad

Thursday-
Lunch- Leftover smokies
Supper- Chicken Broccoli Alfredo
             Raspberry Salad

Friday-
Lunch- Leftover alfredo
Supper- Croation Brats
             Brussel sprouts

Saturday-
Lunch- Leftovers
Supper- Leftovers

Sunday-
Lunch- Eat Out
Supper- Popcorn and snacks

     So I got my groceries at Fareway and spent less than 40 dollars for the whole week! Awesome! I'm so happy about that! Once I got home it was time to prep some of the food for the week like I talked about in my post about putting away groceries. I started by putting some chicken in a big pot with a little water in the bottom, then I added lots of seasoning to it and let it cook. 

While the chicken was cooking I decided to chop the veggies. I chopped broccoli and red bell pepper for supper on Thursday. I went ahead and put it in a bag and labeled it Chicken Alfredo. 

Then after the chicken was cooking I seperated it like this. 

I took out the chicken itself and then strained the broth. I sliced half the chicken for chicken alfredo and shredded the rest for white chili. In the bag for the white chili I added back what I had strained from the broth as I had added dehydrated onion and this will be a good addition to the chili. I labeled them like this and put them in the freezer. 


Then I left the broth sit in the container for a little while and then skimmed the fat off the top. Then I poured it into ice cube trays and froze them for about 6 hours. It made 22 cubes or 22 oz. I them took them out of the trays and put them in a resealable bag and labeled it. I will be using some of the broth for the chili this week. 
So by doing this I am Organized CookingForReal!

Life Update: Moving

     So last night it finally hit me. We are moving in 2-3 weeks! Panic right??? Well, I'm not really panicking (yet anyway). But this realization was definitely a motivation to start packing. So last night I decided I might as well get started. I decided to start with the closet that was basically our storage closet. This is what it looked like before from the hallway... 

Here is a view looking from the top so that you can see the back of the closet...


And this is what it looked like after.... 


     Most of what was in the closet was already in rubber totes or boxes but I took everything out, went through it and labeled the boxes. I decided that I am going to make sure that all boxes are well labeled. They will have a label that tells what is in the box but also what room it will go in. This way when we are actually moving, as soon as the box comes in the door, it can go into the appropriate room. I not only finished this closet but I also went through the bathroom and took out all the towels that we will not need as well as any toiletries and extra supplies that I can live without for a month. So all that is left in our bathroom is things that we need until we move. 
     Also, our moving experience is going to be somewhat different than many people moving experiences. We are currently living in my boss' house. I have house-sat for them for the last 3 years as they spend most of their time in Texas. But now it is definitely time for my husband and I to have a place that is truly our own. We are buying a condo that is a little less than 1000 square feet. It is going to be a welcome change as we are currently living in a 3 story house that I am quite tired of taking care of. So keep checking for moving updates! I am going to try to keep blogging so that you can see the changes but who knows how crazy busy we will be. I will try to be sure to take pictures along the way so that I can at least post about our move after things settle down. So until next time, I'm out!

Quick Tip of The Day: Magnetic Strip

     Have you been looking for the solution to the case of the missing finger nail clippers? Well, look no further! Here is a simple and quick tip to employ in your bathroom medicine cabinet.
     Adhere a small magnetic strip to the inside of the medicine cabinet door. This way you can stick your tweezers, nail clippers, metals hair clips and scissors on the strips. You will always be able to find them, and you won't have to search!!!

Sunday, September 23, 2012

First freebie!

     On Friday, I got so excited when I went to the mailbox! And this is what I saw...


     I got my first freebie in the mail! You see, lately I have been signing up for freebies online and this is the first one I got. I got a sample of Purex UltraPacks liquid laundry detergent. This is what was inside...


     Not only 1 sample pack of detergent but also a 50 cent coupon if I choose to purchase this after I try it. But your probably wondering how I got into freebies and how you can get started too right?
     Well, it all started on YouTube. Surprised? If you know me very well or have read many of my posts probably not. The first video I saw was by Mom's Fun Money. I was amazed by all of the free sample that she was getting so then I went to her website that she mentions in her videos and I went to the Freebies section and started filling some of them out. I have signed up for everything from laundry detergent to shampoo and conditioner to perfume to coupon books. I can't wait to get more!
     So now that you know how I got started you are probably wondering how you can get some of this action right? Well there are 3 website that I check for freebies right now. Obviously, they will be comparable but sometimes they have a few different offers. The first is the Freebie page on Mom's Fun Money (link here). Another is www.icravefreebies.com. The final one is The Peaceful Mom blog. So go ahead and check out these websites and see what you can find! 
     One suggestion I have to go along with this is... have a junk email account. Use this email for anything like this that you sign up for. That way if it is something that you need to get an email for you can find it but it will not clutter up the email account that you use regularly! If you follow this tip you can get Organized FreebiesForReal!!!

Friday, September 21, 2012

Recipe Taco Soup

     It's definitely fall around here. It's cold and damp today. So it's the perfect day for soup!!! So I thought I would try a new recipe for taco soup. My mom always used to make taco soup when I was little but I hated it. As I got older I began to really like it. It is such a hearty soup but it is still different then chili. Here is the recipe I used. 

1 lb ground turkey
2 Tbsp taco seasoning
1 medium red onion
1 red bell pepper
1 green bell pepper
1 15 oz can black beans- drained and rinsed
1 15 oz can black eyed peas- drained and rinsed
1 15 oz can pinto beans- drained and rinsed
1 15 oz can corn
1 15 oz can of Mexican style tomatoes
1 15 oz can diced tomatoes
1 8 oz can tomato sauce
1/4 cup salsa

Brown the meat in a large pan. Add onion and bell pepper, sauté for a few minutes. 
Add the remaining ingredients and stir. Simmer. Top with your favorite soup toppings like shredded cheese or tortilla chips!

That's it! Can it be any easier??? You can add a little more water if it gets too thick for you. You could also put this in a crockpot and cook on low for several hours. This can also be frozen for up to 6 months in a resealable freezer bag or container.
How does it look?


Wednesday, September 19, 2012

Recipe: Beef Stroganoff

     Tonight is a real source of anxiety for me. The reason: Beef Stroganoff. I have always loved beef stroganoff, it's a classic. But someone in this family has never liked it, I'm not going to name any names, *cough* Graham! I've made it 2 times for him. The first time I will agree it wasn't very good because I didn't get to use my normal ingredients. But the second time it was good. Graham Cracker says that it is bland and is just mushy. So tonight I am going to use Martha Stewart's recipe for beef stroganoff and if he doesn't like it then, I'm going to throw in the towel. 
   Here is the recipe that I am going to use. 

Ingredients

  • 2 pounds beef chuck, trimmed of excess fat and cut into thin slices (about 1/2 inch thick and 3 inches long)
  • 1 large onion, chopped (about 2 cups)
  • 1 pound white mushrooms, trimmed and halved (or quartered, if large)
  • Coarse salt and ground pepper
  • 2 tablespoons cornstarch
  • 1/2 cup reduced-fat sour cream
  • 2 tablespoons Dijon mustard
  • Cooked thin egg noodles, for serving
  • Chopped fresh dill, for garnish (optional)

Directions

  1. In a 5- to 6-quart slow cooker, toss beef, onion, and mushrooms with 1 1/2 teaspoons coarse salt and teaspoon pepper. Cover, and cook on low until meat is tender, about 8 hours (or on high for 6 hours).
  2. In a 2-cup glass measuring cup, whisk cornstarch with 2 tablespoons water. Ladle 1 cup cooking liquid into measuring cup; whisk to combine. Pour into a small saucepan, and bring to a boil; cook until thickened, about 1 minute. With slow cooker turned off, stir in cornstarch mixture, then sour cream and mustard. Serve beef over noodles; sprinkle with dill, if desired.

As you know I already made the roast last night. So I am just going to make the sauce, add more mushrooms and cook the egg noodles. I hope this goes well.

Later: I forgot that I needed beef broth for this recipe so I had to thaw out some of the beef broth cubes that I made. They were supper easy to thaw out in a saucepan. In a seperate pan, I suated more mushrooms and heated up the left over roast. Then after I added the broth with the cornstarch to thicken it, I shut off the heat and added the sour cream and Dijon mustard.  When I started making it, I was really nervous. I had no idea if Graham would like it or not. And guess what? HE DID!!! He said it had a lot more flavor than the beef stroganoff that I had made before and it had a better texture too. He could actually pick out the mustard and said it was very good. I was going to include a picture of it but I forgot to take one. It didn't really look very appealing in the pan because you couldn't see the texture. But I don't care because Graham Cracker liked it! He even just said that I could make it again! Bazinga!!!

Freezing beef broth

     So last night for supper, I made a beef roast in the crockpot with potatoes, carrots and mushrooms. But I forgot to add onion! Oh well! But the roast was a hit. Graham Cracker said that roast was his mom's thing, she made it every Thursday night. So I'll admit I was a little nervous about it. Monday night I had put everything in the crockpot as I knew that I wouldn't have time Tuesday morning (I had to leave the house at 6). So first I put in the crockpot liner (love these!) and then the roast. I seasoned it with salt, pepper, garlic and parsley. Then I quartered some red skin potatoes, added some baby carrots and some sliced mushrooms. I put the lid on it and stuck it in the frig. 
     At 6 o'clock Tuesday morning I added a little water to the crockpot and turned it on low and let it cook.... 15 hours!!! We had a late night that night and didn't eat until 9 but I think the extra time was worth it. It was amazing, the roast just feel apart and the vegetables were so tender and flavorful from the broth. Mmmm, this is making me hungry for lunch, leftovers!
     So after supper I went ahead and divided the leftovers, the beef, the veggies and the broth. I am going to use the leftover beef for beef stroganoff tonight (look for the post either tonight or tomorrow). But then Graham Cracker said that I should really save the broth. So I did. This morning I took it out of the refrigerator and scrapped the fat layer off the top. Then I added about 2 tablespoons of broth to each ice cube section of our ice cube traw. 2 Tablspoons equals 1 oz so that will make it easy for when I add the broth to a recipe. Here it is right before I put in the freezer.


 I froze them for about 4 hours. After they were frozen I broke them out of the tray, put them into a resealable bag and labeled it like this...


Tuesday, September 18, 2012

Recipe: Mini Spinach Artichoke Frittatas

     Breakfast seems to be the hardest meal of the day for me. I get up early enough (6:00 a lot of days) and there never seems to be time for breakfast before I head out the door between 7 and 8. So I decided to make some Mini Spinach Artichoke Frittatas. These can be made ahead of time and kept in the frig, then popped in the toaster oven (I don't use microwaves) when you need a quick breakfast!

(Yes, I know there are only 11 but I had to try one! Lol!)

     This is my first time making these. You are actually supposed to make them in mini muffin tins but I just used a regular muffin tin. I found this recipe on Pinterest but it was originally from Kraft Recipes.

6 eggs, beaten
3/4 cup Parmesan cheese
1 Tbsp. flour (I used wheat wheat)
1 Tbsp. Dijon mustard
1/2 tsp. black pepper
1 can (14 oz) artichoke hearts, drained and chopped
1 pkg. (10 oz) frozen chopped spinach, thawed and drained
3 green onions, thinly sliced
1/3 cup finely chopped red bell pepper

Preheat oven to 350 degrees.
Mix first 5 ingredients until well blended. Add remaining ingredients. Mix well.
Spoon mixture into 12 muffin tins sprayed with cooking spray.
Bake 25 minutes or until toothpick inserted in center comes out clean. 
Cool completely and put in resealable bag.
When ready to enjoy, heat in toaster oven.

Sept 19th Update:
So this morning Graham Cracker heated these up for breakfast and he loved them. He put them in our toaster oven at 350 degrees for 10 minutes. He had 3 of them so he must have loved them!!! Time to heat some up for me!


Monday, September 17, 2012

Recipe: Crisp Water

     Everyone knows that you should drink water because it is good for you right? But face it, sometimes we get tired of plain ole' boring water. Well, I've found myself not drinking very much water lately and I know that I don't feel as good when I don't drink as much as I should. But I remembered something that we used to do to water a few years ago that I loved. 
      You can either do this is a big pitcher or you can just do it in your glass or bottle and refill it as needed. Take a couple thin slices of cucumber, a couple slices of lemon or a few drops of lemon and a few slices of peeled ginger root or as I just tried a few sprinkles of ground ginger. Add them to the pitcher, glass or bottle and let them sit for a few minutes. You can leave it in your container and just keep adding water as needed. 
     It is such a crisp refreshing flavor that will encourage you to drink more water. I was just doing a little bit of research on this as well, and I found out that this is actually a detoxing drink! Who knew? Many of the recipes add mint leaves as well. I haven't tried it with mint but I like it just the way it is! Try it out and let me know what you think! And then we can Organize DrinkForReal!

Sunday, September 16, 2012

New Blog Design!!!!

     So as you can see there have been a couple of changes to OrganizedForReal!!! I've added tabs to my blog to make it easier for you to find exactly what it is that you are looking for! 
     You'll notice that there is also a "cooking" tab. Tonight Graham Cracker recommended that I start posting some of my recipes with pictures. Lately I've been making a lot of new recipes so I think that is a great idea!!! I hope you enjoy the recipes and feel free to suggest recipes that you have tried or that you would like me to try and post. I've also started cooking things to freeze and make later so look for those posts too. And please share any of your tips with me as well! Together we can get OrganizedForReal!

Saturday, September 15, 2012

Project: Book Pedestals

     On Monday, I had a shout out to the DoItOnaDime channel on Youtube and I mentioned her awesome idea for a book pedestal. I was planning on waiting to do this until we were in the condo but Graham Cracker's (my husband's) Star Wars book was screaming at me. And before you freak out, yes, I ask for his permission to use his book! It's a Saturday afternoon and I felt like a crafty project. So I decided I would try this out.
     Now in her video she said that she made one in about 10 minutes. I was watching tv online and I wasn't really paying attention to how long it took. But it's a great thing to do while you are sitting doing something else. It's easy to fold the pages because after the first page you just fold it to the spine of the book. (At least that is what I did with the first one, you'll have to keep reading to see what I did later!) As you go on it gets harder to fold them because the book is folding into the circle but just follow her instructions and you will be fine. Then when you get to the end, it creates a perfect circle! It's so cool!


     So here is how my first one turned out!
From the top it looks like this...

     Graham Cracker thought that it was really neat so he gave me his other Star Wars book. Awwww so sweet! LOL! But I didn't want to make it the same as the other one. I got an idea! I decided that I would do the first 25 pages the way that I had before but the the next 25 I would only fold a third of the page in. I keep track of how many pages I had to fold until the change but following the page numbers. It was harder to keep the thirds even but I just used the title at the top of the page to judge how far to fold it. It worked great! And it's so cool! 


And from the top...

     Isn't that awesome? I have a lot more ideas of ways that I can fold the books and I can't wait to try them! But what if you don't want to ruin all your books? Well, I got a few ideas. Our library has old books that are always for sale for less than a dollar a piece! Also, I am going to check out our super dollar store here in town and of course, you can always find tons of books at garage sales for super cheap! I am also very excited to try different sizes of books. The first book I did was a little over 350 pages and the second one was almost 500. You could try books with more or less pages as well as different page sizes! I can't wait to try more!
     And you may be thinking, "Yeah, that's cool and everything but what am I going to do with them? Well check out the new centerpiece on our coffee table!!!! I love it and so does Graham Cracker!

     Isn't that awesome???? So not only can you find a new purpose for those books that you don't want anymore but you can also find a use for cheap books that no one wants anymore and decorate your house at the same time!!! I hope you decide to give this a try so that you can really be Organized DecoratedForReal!


Quick Tip of The Day: Pillowcase Pack

     So I'm sure that you've gone to your linen closet to grab a fresh pair of sheets for the bed or maybe its time to put on the flannel sheets for winter. You have to dig to find them, they are all messed up and wrinkled or you can't find one that one last pillowcase. We've all been there right?
     Well, no more! Today's quick tip is make a pillowcase pack of your sheet set. Once you've folded all of your sheets nicely, go ahead and take one of the pillow case to the set and slide your fitted sheet, your flat sheet and the other pillow case into it. Then fold the outside pillow case underneath and you have the entire set of sheets together and contained. No more missing pieces! When you do this, you'll be OrganizedForReal!

Thursday, September 13, 2012

Quick Tip Of The Day: Bathroom Clock

     So you're getting ready in the bathroom like you do every morning and you have no idea how much time you have left until you need to leave. So what do you do? You run to the bedroom or you check the clock on your phone, right?
     I don't know why this isn't more common but why don't all bathrooms have a clock in them? Do you have one in your bathroom. Leave me a comment and let me know if you do! I think that a clock should be a staple in every bathroom. I think a lot more people would be on time if they had one in their bathroom. So that is why today's quick tip of the day is: Have a clock in every bathroom. If you do, it will help you to be Organized OnTimeForReal!

Tuesday, September 11, 2012

Quick Tip Of The Day: Wire Hangers

      Today's quick tip I actually saw while I was surfing the web, I don't remember where exactly. But for me, I absolutely hate wire hangers. They can get rusty and ruin clothes, they bend, they make bumps in clothes, and they can snag or poke holes in your clothes as well. I use plastic hangers for shirts and wooden skirt hangers for skirts (obviously), in case you are wondering.
     So what do you do with the old wire hangers you already or or wire hangers that you get when you get clothes back from the dry cleaner? Gather them all up and take them back to your dry cleaner!!! And if your dry cleaner will not accept them, find one who will. And absolute worst case scenario, please recycle them, don't just throw them in the garbage. And by doing this, you can be OrganizedForReal!


Monday, September 10, 2012

Shout Out: DoItOnADime

     So every once in a while you come across someone or something that is an absolute inspiration to you. Well, I was searching organizing videos on Youtube as I have been for a while and came across a gem. This immediately made me think of my friend Brittney (Look! I finally spelled it right!) who had ask about organizing on a budget. Well if that's something that you are looking for I highly suggest the DoItOnADime channel on YouTube! 
     Not only does she use her small budget to organize but she also uses it to decorate. I'm going to use some of her ideas for decorating once we move into the condo. I mean seriously, a book pedestal and toilet paper wall art! They may seem stupid or cheesy but check them out and you are going to want to do them yourself! Click this link to go to her channel! 
     Then she also had some very clever tricks like a free resealable container, totally original. She also has a few interesting videos about if dollar stores are worth it and her shopping hauls. So I highly recommend that you check out DoItOnADime! If you do, you can be OrganizedForReal!

Tip of the Day: Putting Away Groceries

     So, you just got home from running your errands for the week (time management post coming about this soon), you get the car unloaded and now that seemingly daunting task of putting away groceries. "Where do I even start?", you think. 
     Well first, take the groceries out of the bags so you can see what you have. If the person who packed your groceries did a good job, things of the like will be together. But if they didn't do such a good job, this gives you the chance to sort things out. Sort your items by refrigerator items, freezer items, dry goods, pre-packaged food, canned goods, cleaning supplies, paper products, etc. 
     Now let's put things away. Put away freezer items first so that you don't allow them time to start thawing. Follow this with refrigerator items so that they do not get a chance to warm either. Group all of the refrigerator items that you can do some preparing to together so that you can get those out in a few minutes when everything is put away to wash (be sure to dry them well so they will keep in the frig), cut, and package them up. 
     Now put away your dry goods and canned good. Now its time to repackage your pre-packaged food (granola bars, chips, pretzels, snack foods, etc.). Take an single serving foods out of the box of package and dump them into your grab and go basket or container. This way when you are heading out the door you can find what you want in one convenient place. I use a stainless steel canister set to do this. I have one for bars, one for fruit snacks, one for Taffy. Then your can take your chips and pretzels and package them in small resealable bags. Only do this if you are going to be using them soon or they will go stale. This is something that I haven't really started doing yet but I want to. 
     Now go ahead and put away your paper and cleaning products away as they are probably stored in another area of the house. 
     Now come back to the kitchen and pull out all of the food the you want to prepare. This could include fruit and vegetables that you want to wash and cut or it could be meet that you know you want cut or marinated a certain way for a meal that you planned for this week. (Post coming soon about preparing a weekly meal plan.) For example, I love grapes but if I just leave them in the bag I dont take the time to cut a bunch off and wash it so then they don't get eaten. So I take them out of the bag, wash them and take them all off the stem and put them into a resealable container. (I'm actually eating some of these grapes while I am writing this.) I also wash and cut any vegetables that I can into the size I want (whole carrots into sticks, celery into stalks, etc.) You can also put some of these into snack size resealable bags if you want to be able to grab them and go. (I may do a post about some of the containers that I use in the kitchen, if anyone is interested.) I have found that doing this helps me to eat more fruit and vegetables and my husband loves it too.
     There you go, you not only got your groceries put away but you got a head start on preparing your food for the week! It may take a little extra time to do the extra preparation but believe me, it's well worth it through the week. Hope you enjoyed getting OrganizedForReal!

Sunday, September 9, 2012

Project: Organizing My Niece's Dresser

     As you can guess, I love when the opportunity arises for me to help someone else get organized. So yesterday while I was babysitting my nieces, I went into the 14 year old's bedroom and this is what I saw!
     (Sorry about the picture quality, I didn't have my camera with me so I had to use my cell phone.) I was in an organizing mood so I decided to show her how I had organized my dresser! 
     I had no idea how long this would take, I guessed about an hour. I had my 9 year niece 'help' me too. I was actually surprised though, she did help me fold some of the shirts and she actually did a good job. 
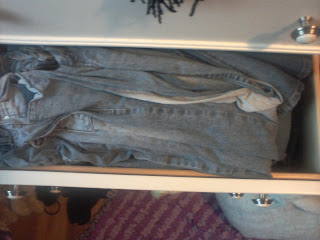
     So the first thing that I did was open all the drawers and see where she was keeping her different clothes. She keep her capris in the bottom left drawer and her jeans in the middle right drawer. She didn't have them folded, well she didn't really have any of her clothes folded. So that was the first thing I changed, I moved the jeans down to the bottom right drawer. I folded them in half length wise and then folded it in half 3 times. So instead of looking like this...

The two bottom drawers now looked like this...

Then it was on to her shirts. The top right drawer is her t-shirts that she wears when she goes out of the house and the middle right drawer that used to hold her jeans, is now where her t-shirts that she wears around the house goes. This was her "lounge shirt" drawer before...

And after...

Look at how much more space it gave her!!!!! And now she can see all of her comfy shirts too!
Here was her "casual shirt" drawer before. She couldn't even close it because there were too many and the doll was in the way.

And now...

Perfect!
Then in the middle right drawer she had all her long sleeve shirts. We found a lot of long sleeve shirts in other drawers simple because there wasn't room for them to be all in one drawer. Before...

And after, all of them fit!

And finally in her top right drawer, she had her swimsuits and cover-ups as well as her casual tank tops. 
Before it was so annoying to have to dig through all of the clothes...

And now...

It's great! The left row has all of her swimsuits, swim-shorts and cover-ups. Then the other two rows are her tank tops.
So then once it was all organized it looked like this!

AWESOME!!!!
So you tell me, which one is better?
This?

Or this?

I think it's pretty obvious. And guess how long it took me? Only 45 minutes! Now that's OrganizedForReal!

Saturday, September 8, 2012

Quick Tip of the Day: Garbage bags

     So today's quick tip not only saves you time but it also saves you space. Keep garbage bags in the bottom of the garbage can! You probably heard this tip before but have you actually ever done it? It makes so much sense! You take the bag out and you can instantly grab another one. And now you don't have to have a place in a drawer to put that roll or box of garbage bags! Genius! It takes just a few minutes to put the bags in the garbage can but it will save you so much time, trust me! Try it out now and you will really be OrganizedForReal! 

Thursday, September 6, 2012

Project: Organizing Dresser Drawers

     Have you ever opened up one of your dresser drawers only to wonder how you are ever going to find what you are looking for? Have you ever decided to refold all the wrinkled shirts in your drawer only to realize that there are shirts that you have forgotten about but actually love? I think we have all been there and done that. But what if I said that you will never have to deal with messy, overfilled drawers again? 
     This had always been one of my problems that drove me crazy until about a month ago. I was watching an organizing video on YouTube and it has changed everything! Alejandra Costello has an amazing channel on YouTube called HomeOrganizing. 3 weeks ago she posted a video on How to Fold A T-shirt. Check this video out so that you can see how to do it. 
 Sounds stupid and way too simple right? WRONG! I'll admit it, as soon as I saw the whole video, I refolded all my T-shirts! She used a tool to fold them this way but there is no reason you can't fold them by hand. Why buy a tool that will take up more of your valuable room to "simplify" your life?
     I wish that I would have taken before pictures (I will from now on with any of my projects) so that you could compare but I didn't. Here are the after pictures:
  
     This is my drawer of T-shirts as well as my long sleeve shirts. I slightly had to modify the way I folded them from the way that I folded T-shirts. I just folded the sleeve in first and then continued to fold them the way described in the video. 

     Then this is the drawer where I keep all my dressy shirts that don't need to be hung up as well as my sweaters. The two rows on the left are shirts, the two rows on the right are sweaters. I also organized them but color so that they are easy to find.
     Then finally here is my drawer with all my camisoles and tanks (a lot, I know). To fold these, I just folded the top down to the bottom of the arm hole and then folded in fourths. 
     And there you have it! I really love this system because I can open the drawer and see every shirt I have, none are hidden. When you take a shirt out, it doesn't ruin the row and shirts are very easy to put back where they belong. It is also very nice because the way you fold it allows you to see the front of the shirt so you can easily identify which shirt you are looking for! Try it out, I know you'll love it! It's what has made my dresser drawers OrganizedForReal!